The front battery box area of the Honda Ruckus is definitely one of the most distinct characteristics in its appearance. However, on a stock Ruck it is very cluttered, and there is stuff everywhere.
One parts that can greatly clean up the front is getting rid of the stock blinkers and installing blinkers in the battery box. Now, like most people this is a little more tedious a task that just swapping out a couple bulbs.
First if you have not read the post on Relocating The Front Blinkers I recommend reading that first as you most likely will want to cut off the existing blinker arms, dont worry its a actually an easy task. This however is not necessary, but does clean up the front considerably. With this modification you will need to purchase an electronic flasher (a.k.a Led flasher) to replace the stock flasher unit, as these bulbs dont generate enough current to trigger the stock flasher unit, I have used both of the units I lit and both are great. The Grote still makes the ‘click’ sound, and the “Custom LED” does not.
Some Light options and Flasher Relays:
Light Bulb Options:
- Kijima Side Markers: $39.00 (Available in clear and Amber)
- Super DOT led markers: $49.00 (Available in smoke and Amber)
- The eBay Special: $17.99
Flasher Relay Options:
- Grote Electronic Flasher: $19.00
- Custom LED FLasher: $19.00
- 552 Flasher (THIS WILL NOT WORK WITH A FULL LED SETUP): $4.70
As you can tell there is lots of options, you can find all sorts of flush mount blinkers on eBay. Personally I love the Kijima Blinkers, they have a great nostalgic styling to them, and fit great. I have listed a few relay options, the 552 flasher is obviously the cheapest, but if you decide to go full led (front and back blinkers) the 552 will not work as it needs a higher current to trigger it than an led can produce, thus the electronic flashers above.
Installation is very easy, you first need to remove the back portion of the battery box(larger side) wich comes off with 4 screws. Now take apart one of the flasher so you are left with the bulb in the rubber cup.

Then you need to mark out where you want them, and then drill a hole the same diameter(or slightly smaller ) than rubber deal on the back of the flasher.

Cool now stick the light in the hole (still just the rubber and bulb) and we will now need to use the rubber portion as our guide to drill two smaller holes to secure the bulb with the provided hardware

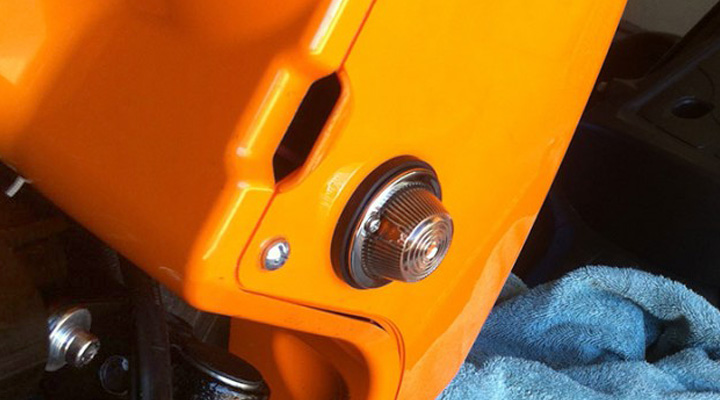
Now put the light glass on and secure it all together with the new holes you just drilled

You can see here how the light fits in from the backside with the wires running through, and the hardware installed.

Thats it you now need to swap out your old flasher and wire in the new one with the existing wires, and use the existing connections that the old blinkers did and wire the blinkers back up and your done.

So fresh and so clean 🙂

Write a Reply or Comment