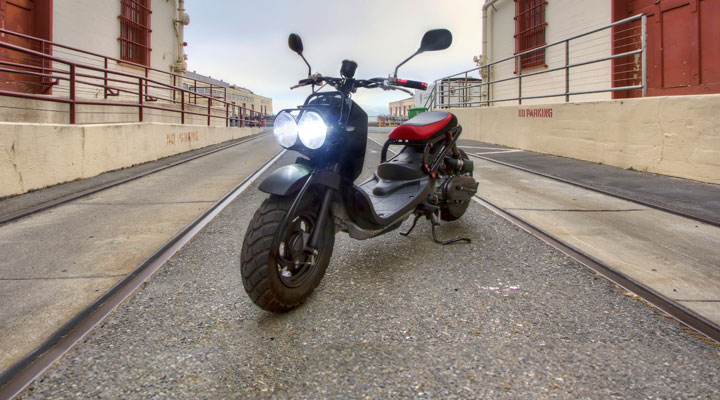
So I am lucky enough to have a really good friend of mine who is an amazing custom car audio and lighting specialist. The day I got the Ruckus his first comment was “dude we gotta put some HID’s in that thing. Of course I was all about it. But in order to do it right I needed some help and it might be worth seeking help if your not comfortable with wiring. The ballasts are the most important part, the bulbs will last for ever, so invest in a good set of ballasts, I ended up going with two slim ballasts you can something similar here on eBay really affordably.
There are a couple of important things to know if you are going to be putting HID lighting in your Honda Ruckus. First, you need to have a healthy battery, not some old one that has been worn to death. Second, these light do actually pull less wattage, 25 Watts compared t0 50 Watts, HOWEVER the ballasts do need to warm every time the lights are turned on.
NOW, on a normal ruckus by default the system lowers the voltage to the main lights, which is why they dim at an idle. This will destroy a ballast in lighting time, as the lights will flicker and eventually burn out the ballasts. Thus you will need resistors and run directly to the battery, obviously which the switch in between.
i ended up wiring my lights so they are only on when the light switch is in the “brights” position, and they are off when in the normal – what use to be daytime running position. So this means you have to turn on the lights when you want them, some might not be a fan of that. The reason for doing this is so the Ruckus can start up with out load on the battery and it will save your HID ballasts.
What you will need:
- Roll of wire
- Electric tape
- Soldering gun and solder (if you want to do it proper)
- One 4 post 12v relay
- One 5 post 12v relay ( cover the extra load post with tape)
- H4 BI-Xenon Kit like this: H4 Xenon Kit
The actual install is quite simple the hardest part is finding a place to fit two ballasts. Luckily ours where rather thin, about 3/4″. We ended up fitting them in between the center column and the main ecu (the big aluminum thing on the left of the battery compartment.) You will need to take the whole battery box off. Once that is out of the way you just need to wire in the relays, a fuse and you should be good to go.

Here is a wiring diagram that layouts the process.

You will need to seal the back with silicon as the new bulbs fit in a little different:

Write a Reply or Comment